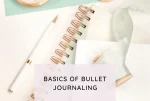
Let’s Get Started on setting up a bullet journal!
A Basic Traditional Bullet Journal

A bullet journal is very customisable, but for now, I’ll walk you through setting up a bullet journal, first introduced by Ryder Carroll from BulletJournal.com. Use it as a starting point, get comfortable with the basics and then get creative and change it from there.
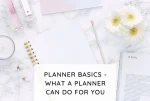
At its heart a bullet journal is an analog system, meaning you don’t need anything more than a notebook and a pen or pencil. However, it is possible to “go digital” with your bullet journal and I’ll show you how in a future post.
To begin setting up your bullet journal you’ll need a notebook, pen and a little bit of time. The type of notebook you use is up to you. The traditional style is a grid or dotted paper, but I find even ruled or blank pages work just fine. Pay attention to the weight of the paper, too thin and the ink will show through to the other side. Paper that is too thick will make your bullet journal too heavy I
The Key
The first page of your bullet journal will include your key. This will record the shorthand you use for your bullet entries. Here are the traditional symbols used. Feel free to add to it, or tweak it to suit your needs.
The Index
The next few pages you can set aside for an index. Depending on the number of pages in your journal, you might allocate two or three double pages. This will allow you to quickly find any collection, or get to a particular month. Title each page as an index page and then number each individual page in your book. I like to do this in short batches of pages at a time, this avoids the inevitable errors if you try to do it all at once. You can then move on to the next section.

The Future Log
With the original bullet journal setup this is a two-page spread that records the coming 6 months. Many bullet journalers find it helpful to use a more traditional yearly calendar instead. This is a great place to record birthdays, and anniversaries, or block out vacation time. If you need inspiration for your future log check out Instagram. Add or note the page number and record your future log in your index.
Monthly Logs
Start each month with a monthly log. Here you’ll record appointments and due dates. You can use a grid layout or one line for each day of the month. While this isn’t where you’ll track most of your tasks, the monthly log will come in handy for those times when you have an appointment or a party invitation. Again, don’t forget to record your monthly pages in the index.
Daily Logs
The daily log is where you’ll spend most of your time. Start a new section each day and record anything important for the day. Make your list of tasks and cross them off as you get them done. Make notes of anything important you need to remember throughout the day as well as appointments as they pop up. Everything gets logged into the daily log for speed and ease. From there you can move it as needed to the monthly or future log, or migrate it to a different day.

Migrating Tasks
At the end of your day, or first thing the next morning it’s time to review your previous day’s tasks and cross out and migrate anything that isn’t checked off. For example, if you didn’t get around to doing laundry, draw an arrow through it and add the task to the next daily task list. If you made a note of an appointment that came up yesterday, move it to your monthly list and draw an arrow through it in yesterday’s list. If something no longer applies then cross it out. Your goal is to deal with each entry from your daily list by completing it, migrating it, or crossing it out.
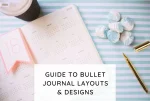
Collections
The final part of the puzzle is collections. These are basically theme-based lists you make that aren’t date related. A perfect example is a list of books you want to read or movies you want to watch. Start the list on any blank page. Title it and start jotting down the books you want to read. Make a note of the page you’re on and add this collection to your index page. Now when you want to add a new book title to this list, you can easily find it in the index.